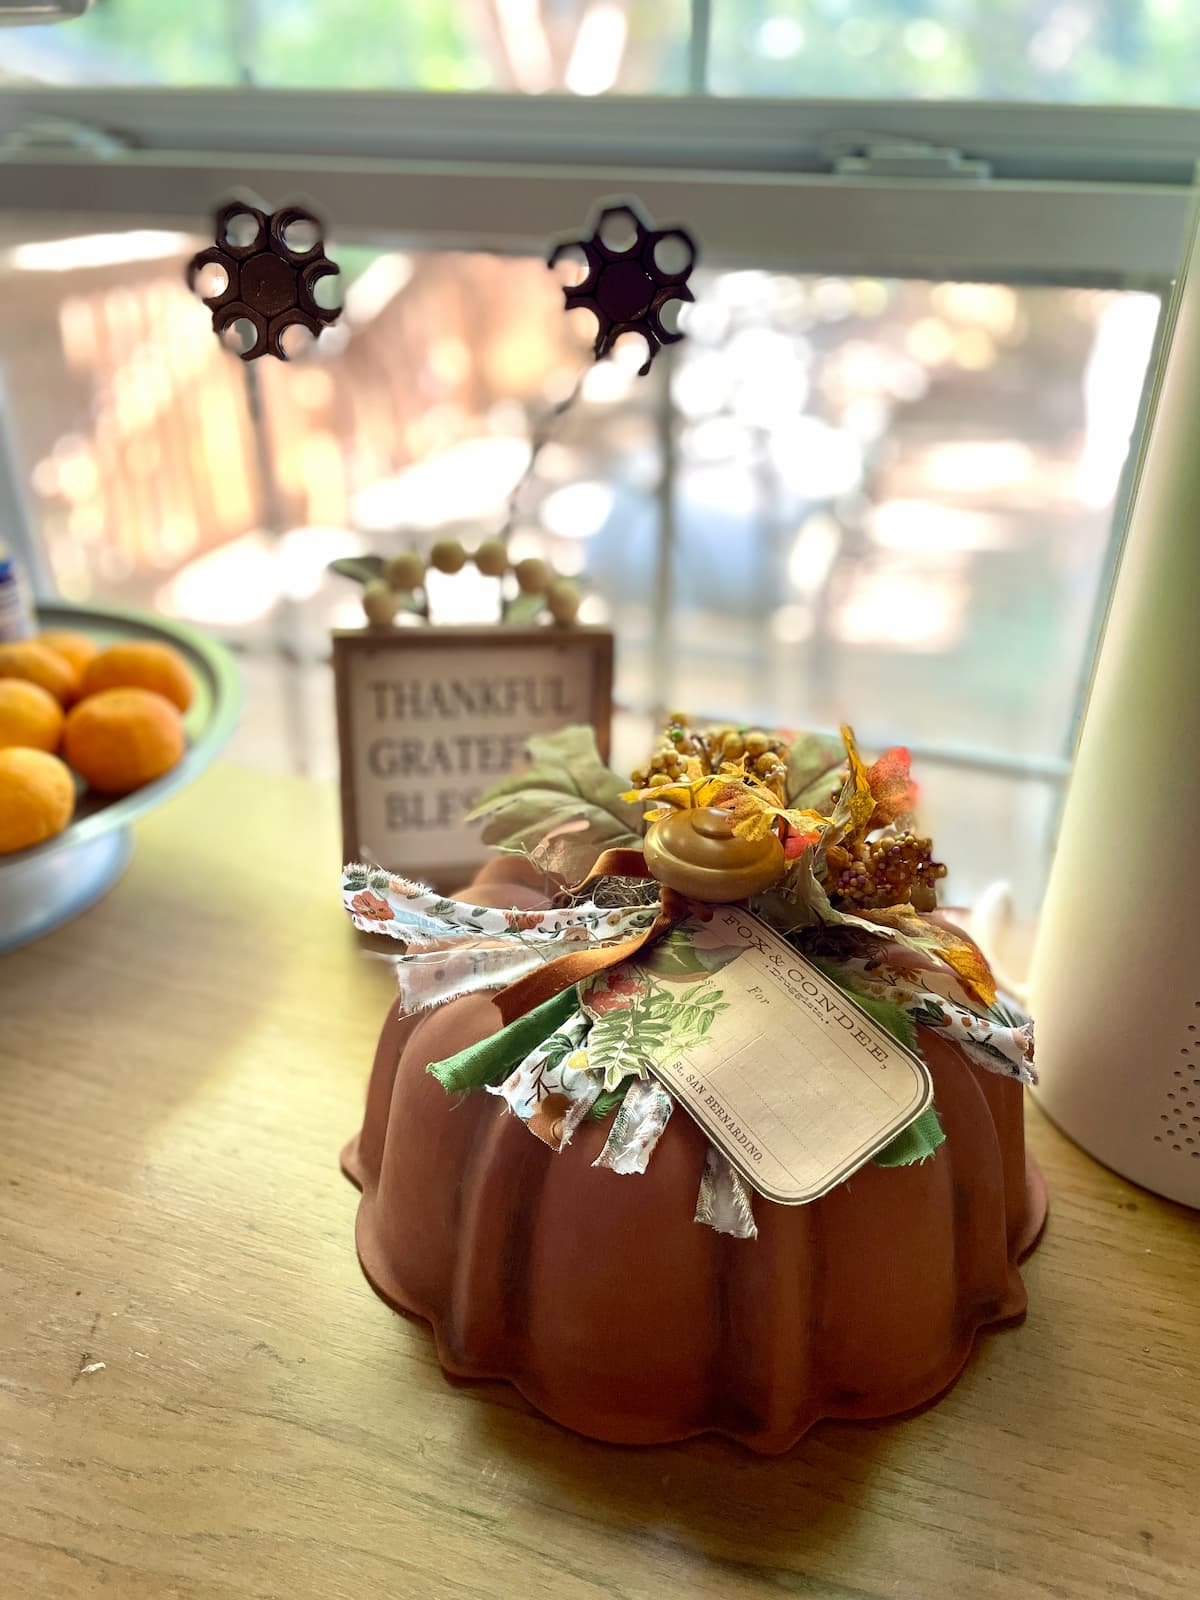
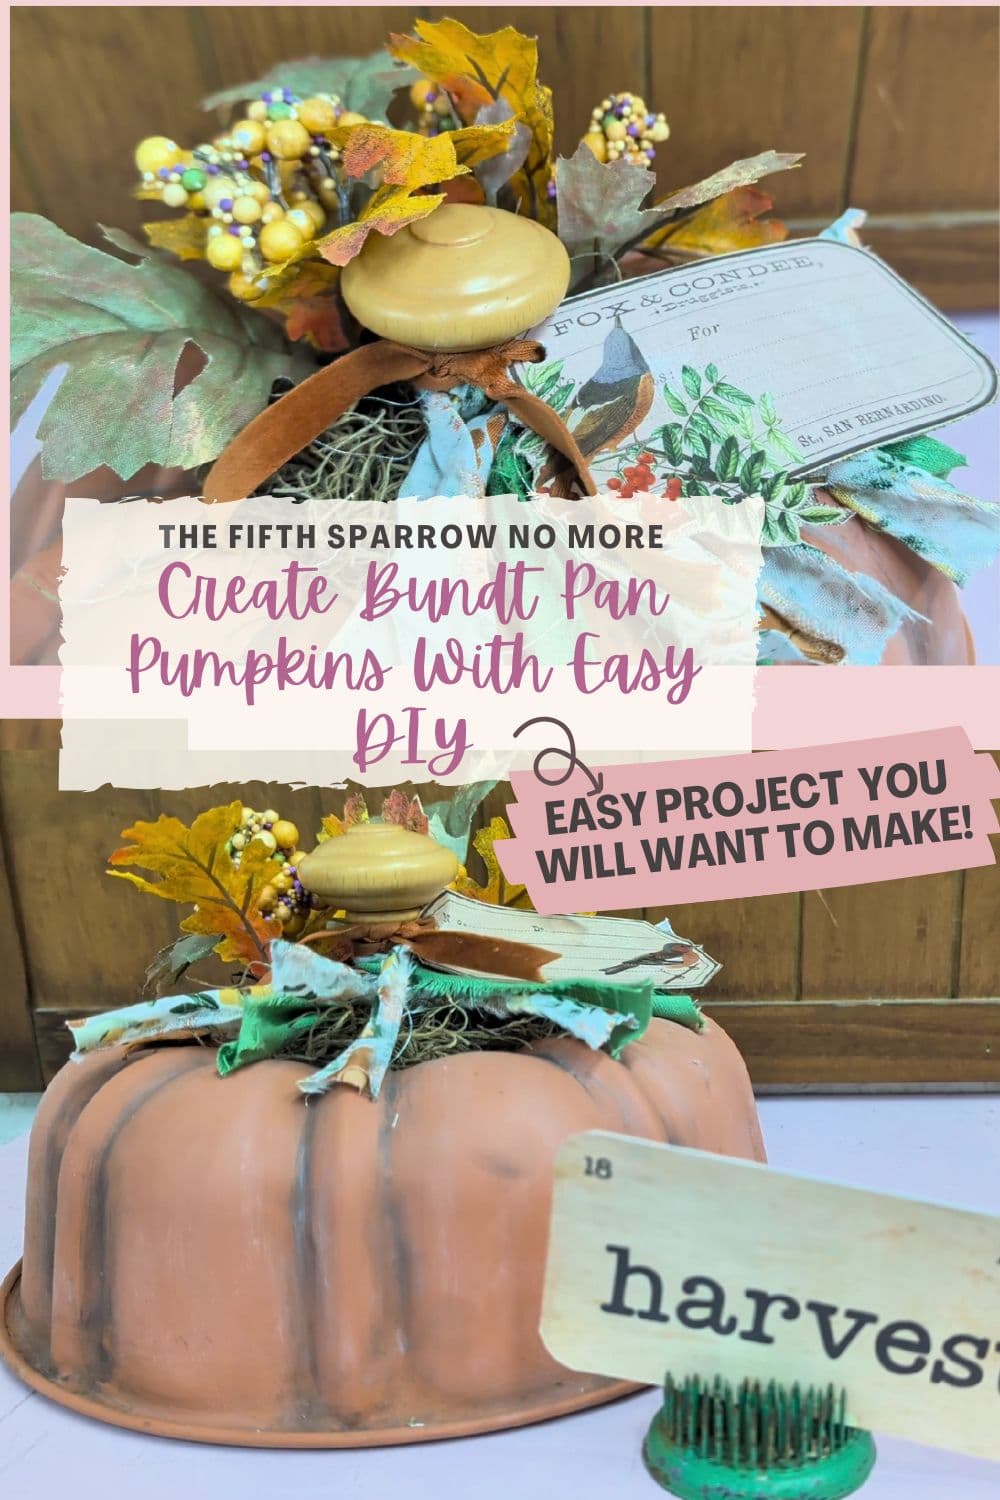
Easy Pumpkin Craft Upcycled From A Thrifted Bundt Pan
Make your next thrift store find that lonely bundt pan you see in the kitchen aisle! However, it won’t be used in the kitchen after this bundt cake pan pumpkin project. It will be used in your fall decorations! Let me show you how to make an easy pumpkin craft from a thrifted bundt pan.
Supplies For The Bundt Pan Pumpkin Craft
Old bundt pan (I got mine at a garage sale)
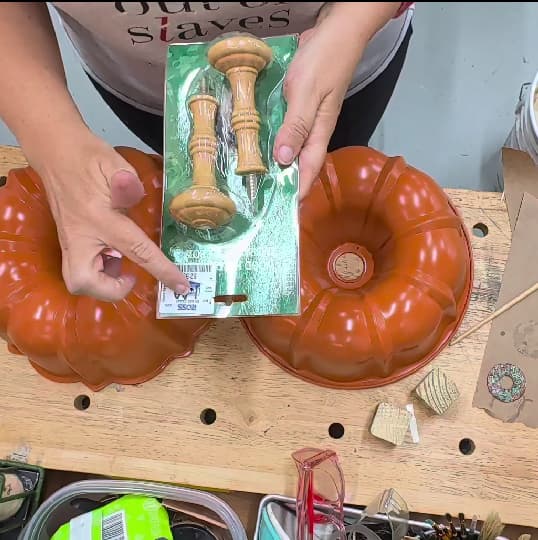
A pumpkin stem for the center of the bundt pan – This can be a spindle, a rusty spring, an actual stem, anything that is a stem shape!
Paint – I used a combination of spray paint and chalk paint for mine!
Hot Glue
Wood pieces to attach your stem (see the steps to see what I used)
The “Fluff and Stuff” for a topping of faux fall florals – whatever your perfect mix is such as a combo of floral moss, red, yellow and orange leaves, faux fall flowers, or sprigs of faux wheat.
Helpful Links To Supplies
These links below links are affiliate links. I make a small commission at no cost to you.
Steps For A Pumpkin Craft Upcycled From A Bundt Pan
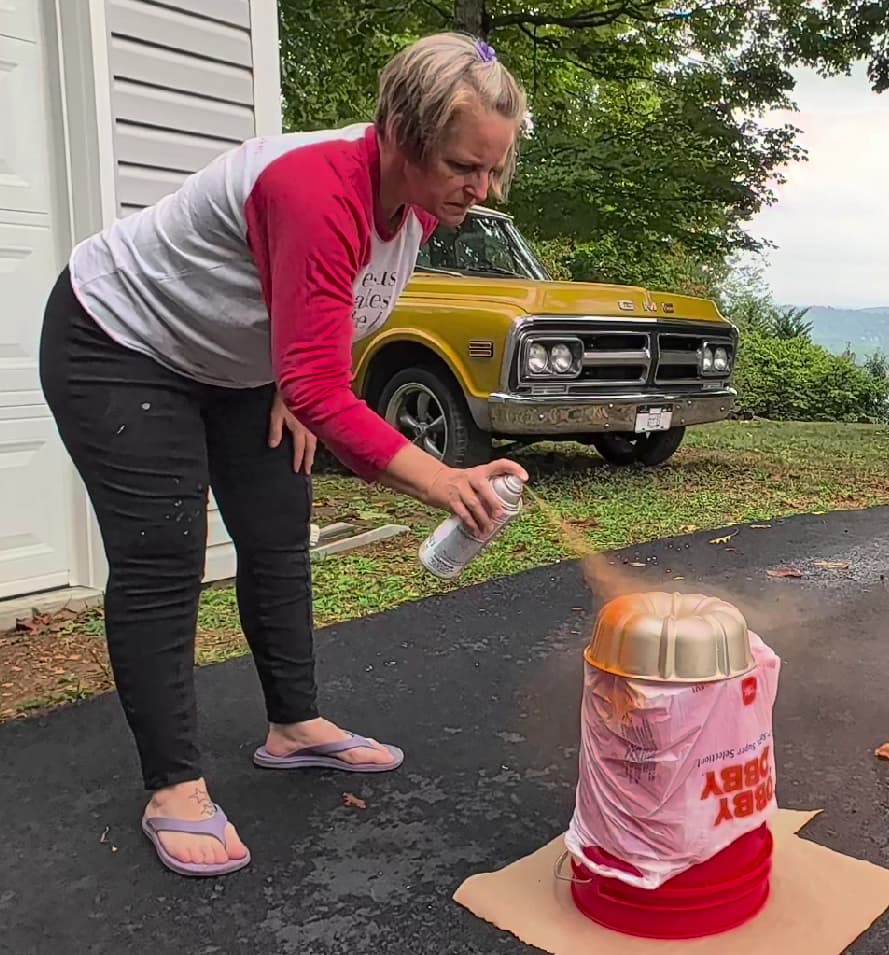
Step 1
- Spray paint your bundt pan pumpkin.
- Do this in a well-ventilated area. This spray paint was bright orange and I applied two coats of paint for full coverage. This won’t be the final color, I am using this as a primer.
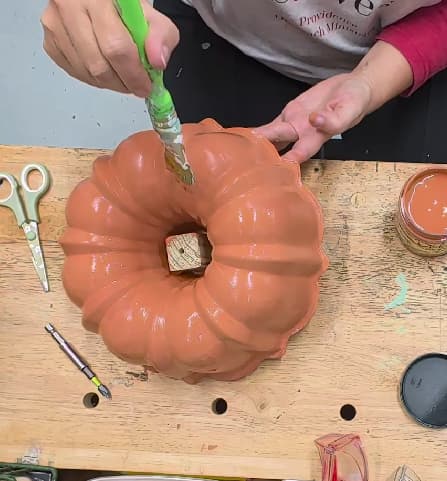
Step 2
- Next step, after letting it dry, is to paint what will be the finished color.
- I am using a terra cotta orange paint – it is a chalk paint from Dixie Belle.
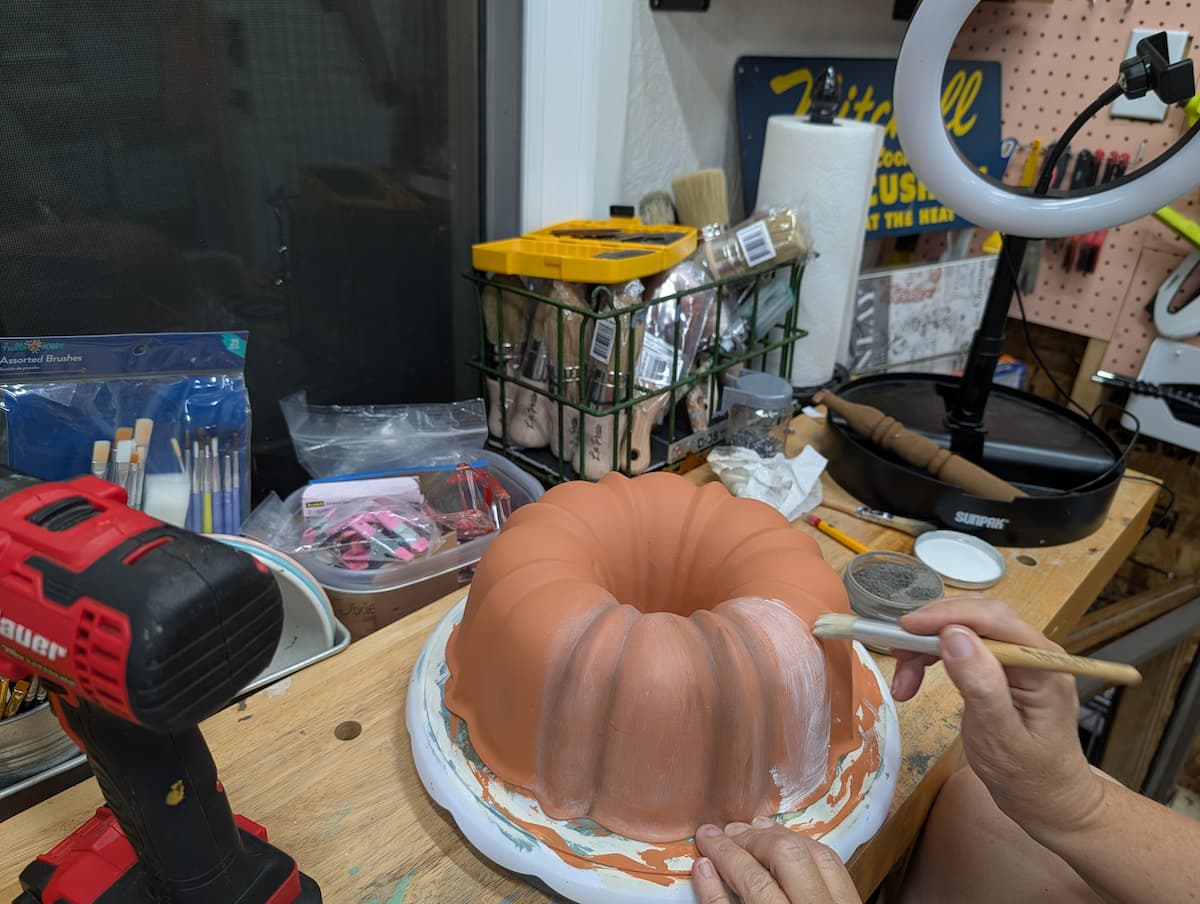

Step 3
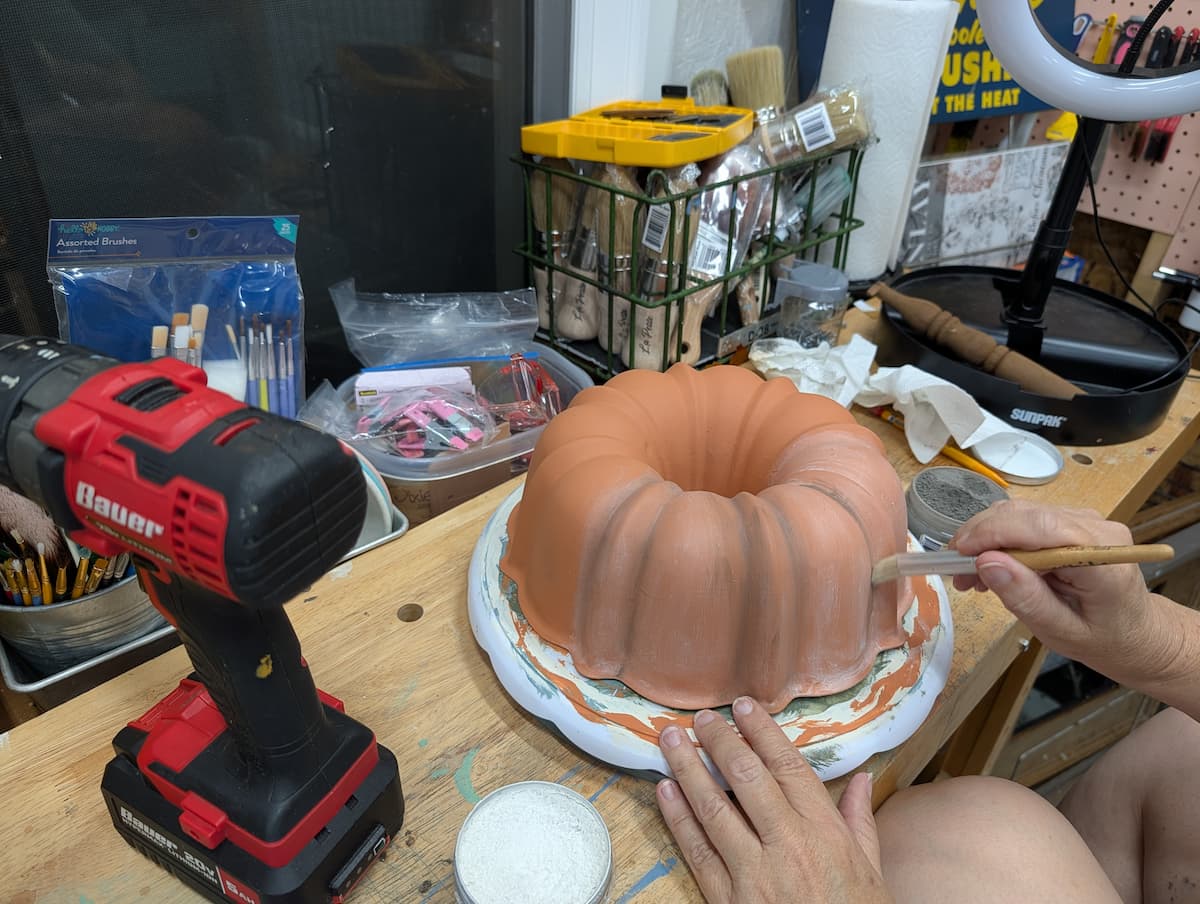
- After the second coat of terra cotta paint dried I used white wax to seal the paint.
- Before the wax dried I used Dixie Belle dixie dirt in the indentions to highlight them.
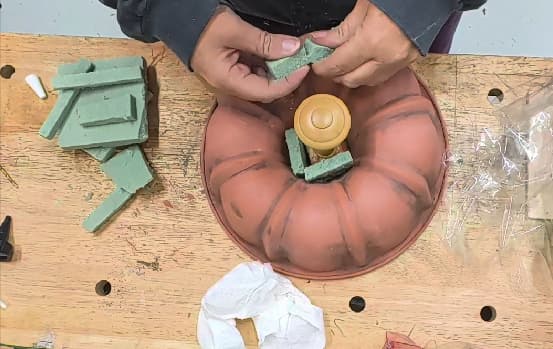
Step 4
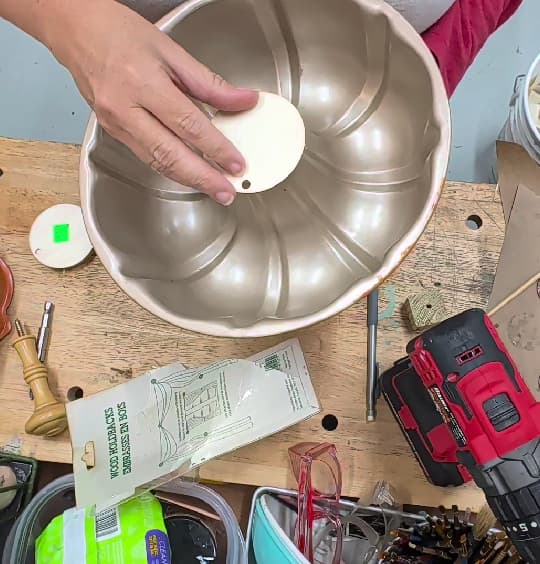
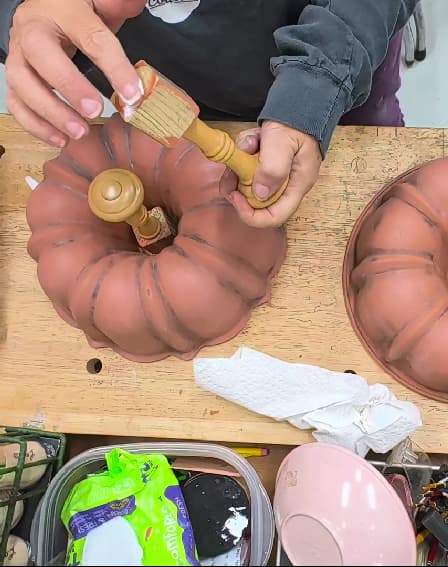
- To attach the stem I placed a block in the center opening of the pan and used wood glue and a screw to attach a wood circle (you could use glue and a cardboard circle) underneath the pan to further stabilize it.
- The best part was that there was a two sided screw in the bottom of the stem so I was able to screw that easily into the block.

Step 5
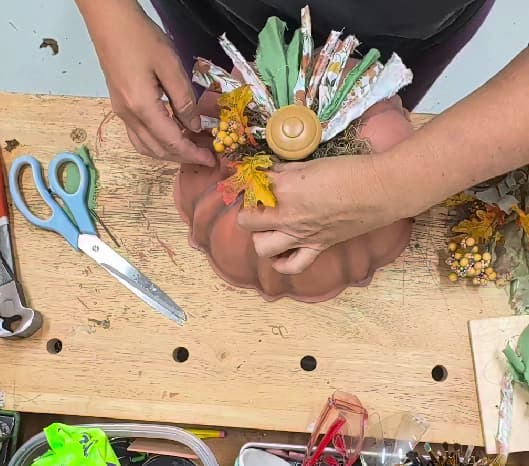
- On the top of the pumpkin and around the stem I used spanish moss, fall foliage, fabric strips and an IOD transfer on a tag.
- I placed florist foam around the stem in the center opening of the bundt pan.
- Each flower stem was stuck into this floral foam after using my glue gun to attach the spanish moss.
Step 6
- After the florals were arranged I tied on strips of fabric to act as the pumpkin tendrils. You could also use burlap ribbon, a strip of brown paper bag that is twisted.
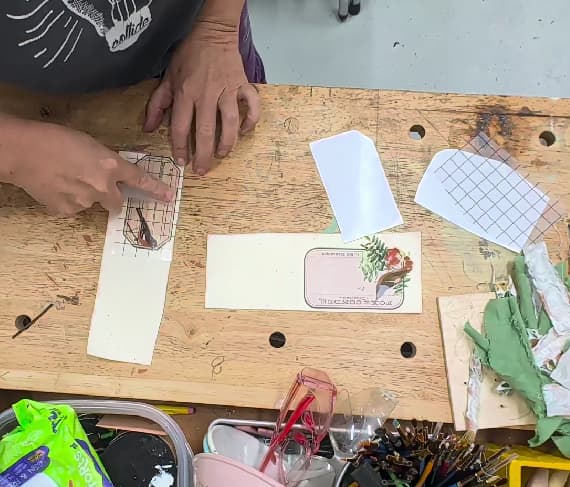
- I then tied on a tag that I made with cotton fabric and an Iron Orchid Designs Transfer.
Watch The Full Tutorial on Youtube:
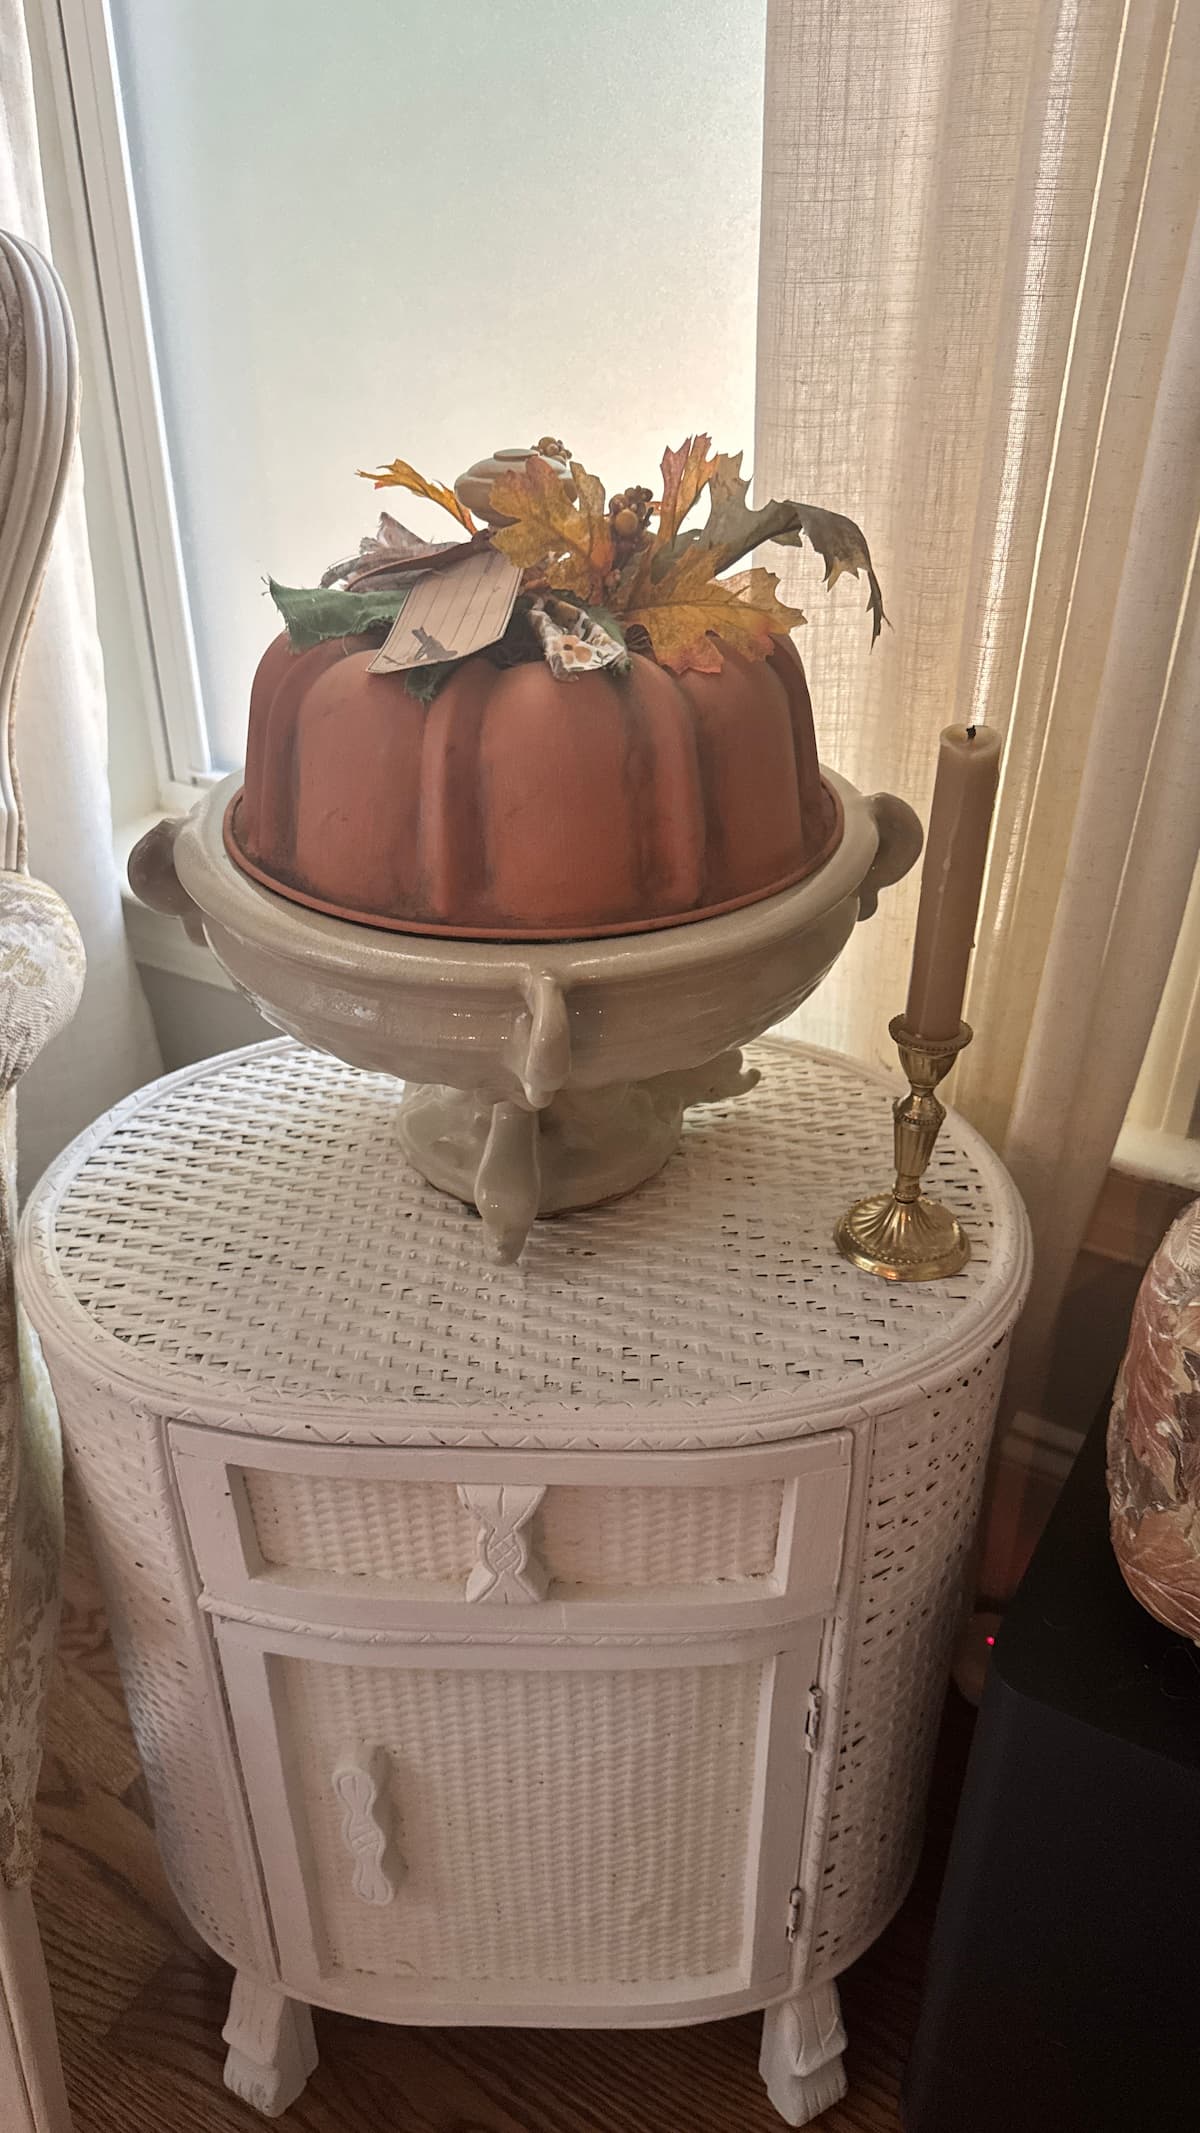
Ways To Display Your Bundt Pan Pumpkin
- For a gorgeous rustic pumpkin for the center of your holiday table.
- A fun way to display it would be to make it a bundt pan pumpkin wreath on your front door.
- Add instant autumn charm to a side table, buffet table or coffee table by creating a fall décor vignette.
Ways to Change Up This Pumpkin Craft
- Thrift a copper bundt pan for this upcycle and skip the extra steps of painting.
- Use a textured paint finish for a rustic look.
- Give your bundt pan pumpkins a rustic texture with mod podge and a grubby mix of spices or just a sprinkle of cinnamon. See how i grubbied up pumpkins with this method here.
Before You Fly Away To Give A Bundt Pan New Life As A Pumpkin
Pin any of the images to Pinterest so you can make your own bundt pan pumpkin – hover over any picture to save the pin to your Pinterest account. So easy!
