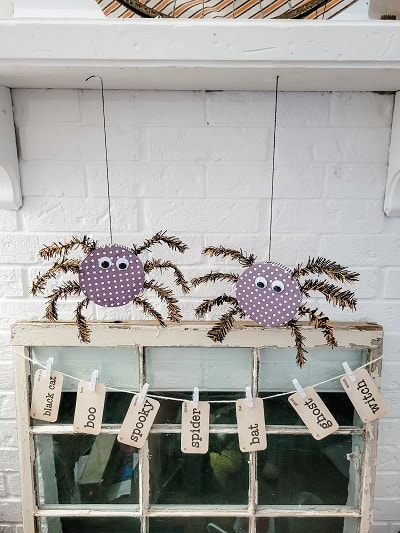
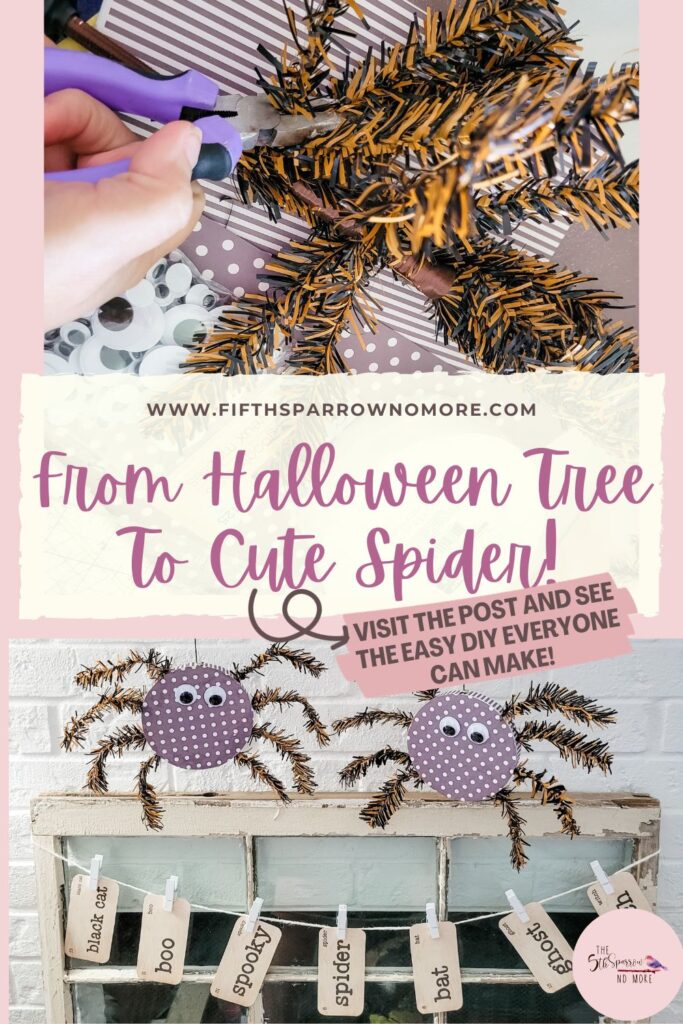
Repurpose A Halloween Tree To Make A Cute Spider
I am not a scary Halloween person. I cannot do scary, I cannot even watch the commercials for scary movies. So if I decorate for Halloween it’s minimal and cute! This DIY to repurpose a Halloween tree to make a cute spider is adorable to decorate mantels, doors and more.
The Halloween trees are plentiful this time of year in many stores and online. But what can you do with them if you’re not decorating a tree for Halloween (save the tree decorating for Christmas), you can use them to create spiders.
Stay with me, I promise it will make super adorable. And then you will have these cute spiders hanging everywhere! So let’s repurpose that Halloween tree into a cute spider’s legs!
What You’ll Need For Your Spider
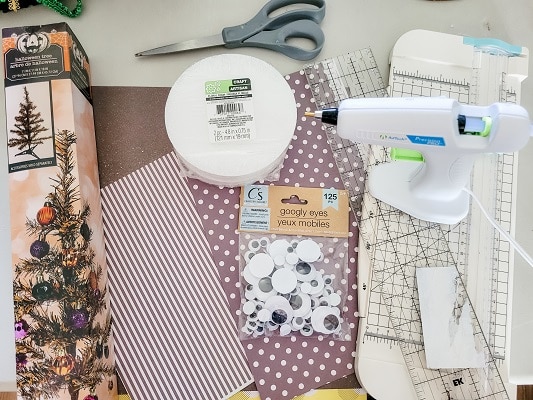
- A Halloween tree to repurpose – Black and Orange or Black and Purple
- Styrofoam Discs – one for each spider you will make
- Scrapbook Paper – you will need enough for both sides of your styrofoam disc plus a strip for the edge
- Google Eyes
- Pencil or Pen, Paper Trimmer and Ruler
- Scissors or Wire Cutters
- Sanding Block
- Mod Podge (not pictured) and Ryobi Hot Glue Gun
The links are Amazon affiliate links. I make a small commission at no cost to you when you click on the above links.
Repurpose Your Halloween Tree – The Steps To Create A Cute Spider
Cute Spider Body
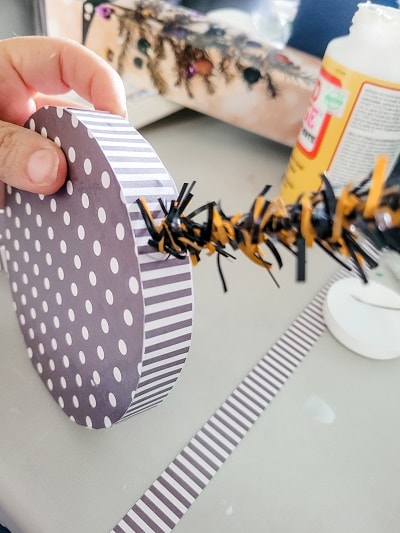
- Trace your styrofoam disc on the back of your scrapbook paper – you will need 2 circles for each spider, a front and back.
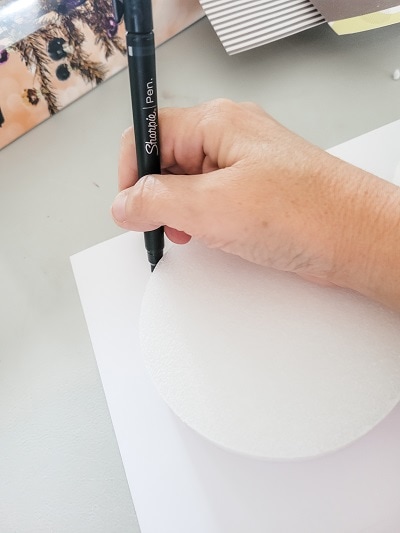
- Measure the width of the edge of the disc.

- Cut a strip to go around your spider. I cut two 3/4 inch strips that equaled 16-17 inches from my 12 X 12 paper.
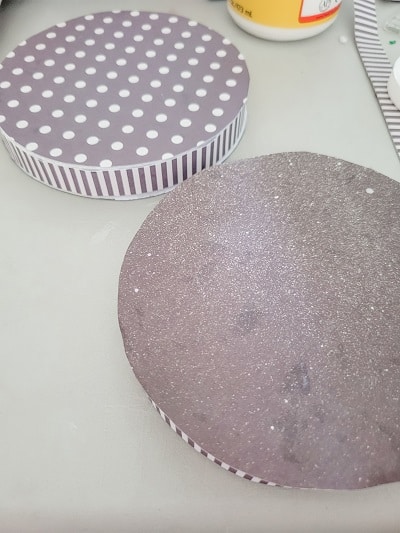
- Adhere all of your paper circles and strips to your spider with Mod Podge.
- Clean up your circles – trim with scissors or sand with sanding block. No matter how well I think I trace the circle it’s always got some funny bumps!
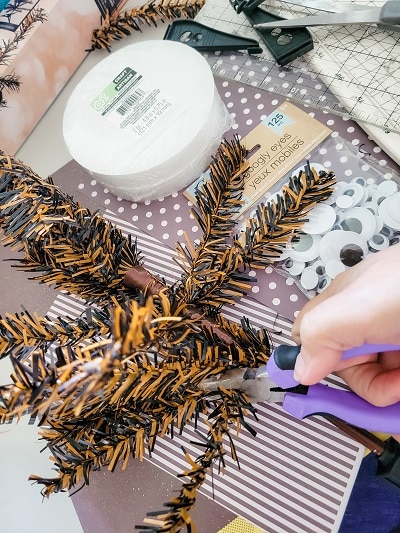
Time to Repurpose That Halloween Tree – Make Spider Legs
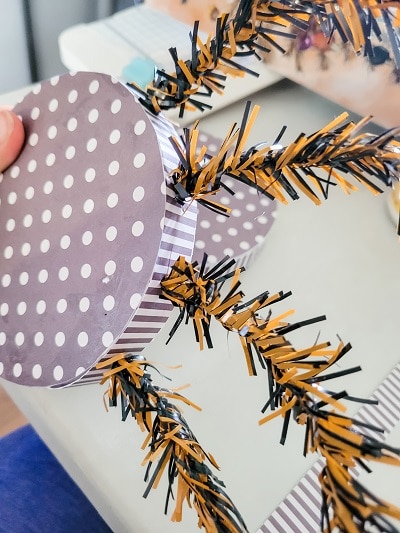
- Snip off eight branches for each spider, the wire is thin enough to use scissors but wire cutters make it easy!
- Poke holes for your spider legs. If its too hard using the pointed end of the branch to make your hole use a small finishing nail to create the hole!
- Place a dab of hot glue on your branch and insert into the hole you made.
- Insert all of eight legs, four on each side, and give them a slight bend.
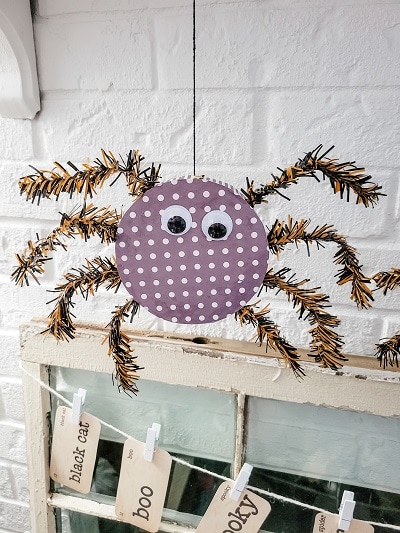
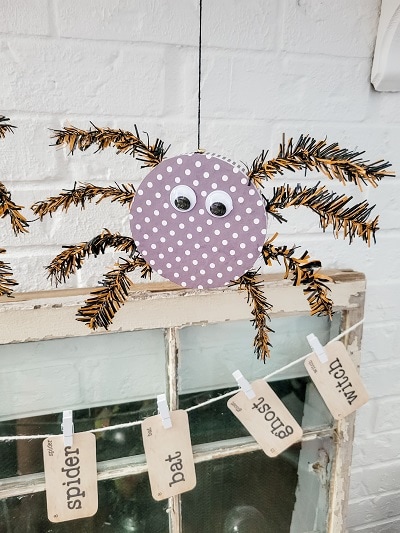
The last step to our cute spider made from a repurposed Halloween Tree?
Googly eyes and a string to hang your cute spider from!
From our Shop

Antique or vintage flash cards are hard to find and especially hard to find when you need a particular word, theme, or a good price! These vintage inspired flash cards take care of that problem by offering an affordable and easy alternative! Order them handmade by The Fifth Sparrow No More or print yourself.
Ideas For Your Cute Spiders in Your Home
- Hang them from your mantel along with a banner of Hocus Pocus Flashcards.
- Attach to your kitchen cabinet doors or hang them from this repurposed shutter.
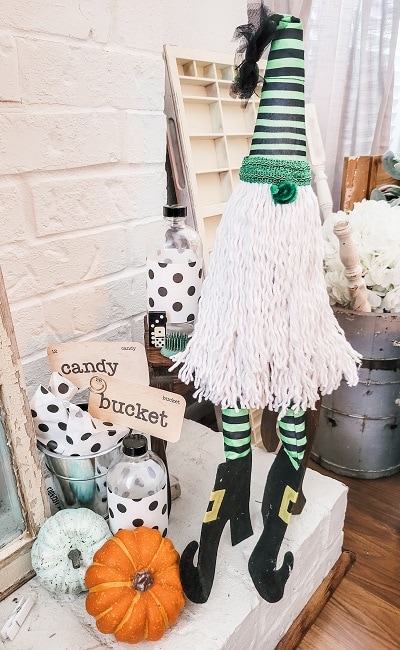
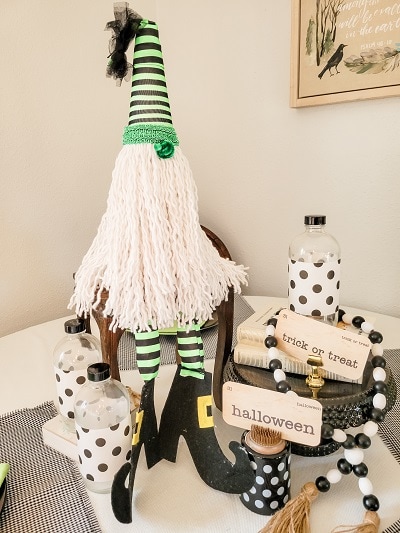
- Or hang from shelves decorated with this gnome and this fun “web” for Halloween!

Where will you put your repurposed Halloween Spider?
More Looks For Halloween
Fall in love with fall! So many ideas for your home from mantels to tables to vignettes. Click on each picture or see all looks to see Halloween decorating ideas with shopping lists and step by step directions to easily create the same looks in your home.

Before You Fly Away To Repurpose A Halloween Tree To Make Cute Spiders
Pin any of the images to Pinterest so you can create a cute spider for your Halloween decor – hover over any picture to save the pin to your Pinterest account. So easy!

Thanks for hosting a FABULOUS linky party every week !
Don’t forget to join us over at the Creatively Crafty Linky Party every Wednesday through Sunday
https://creativelybeth.com/creative-crafts-linky-party/
Followed and Pinned!
Creatively, Beth