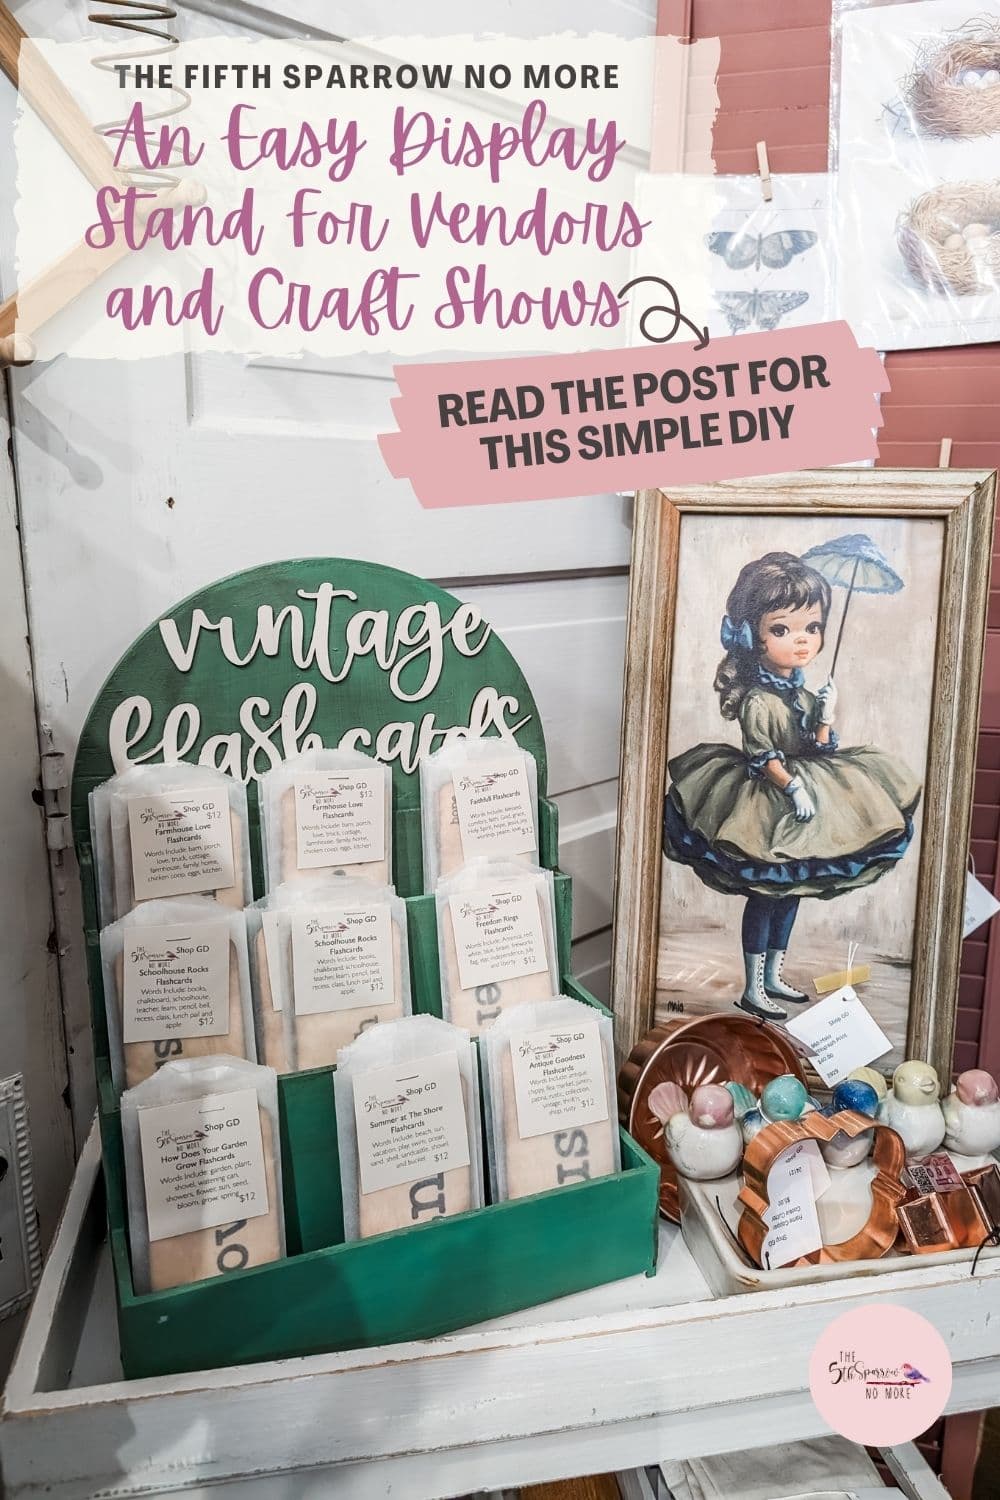
Create An Easy Display Piece For Vendor Booths
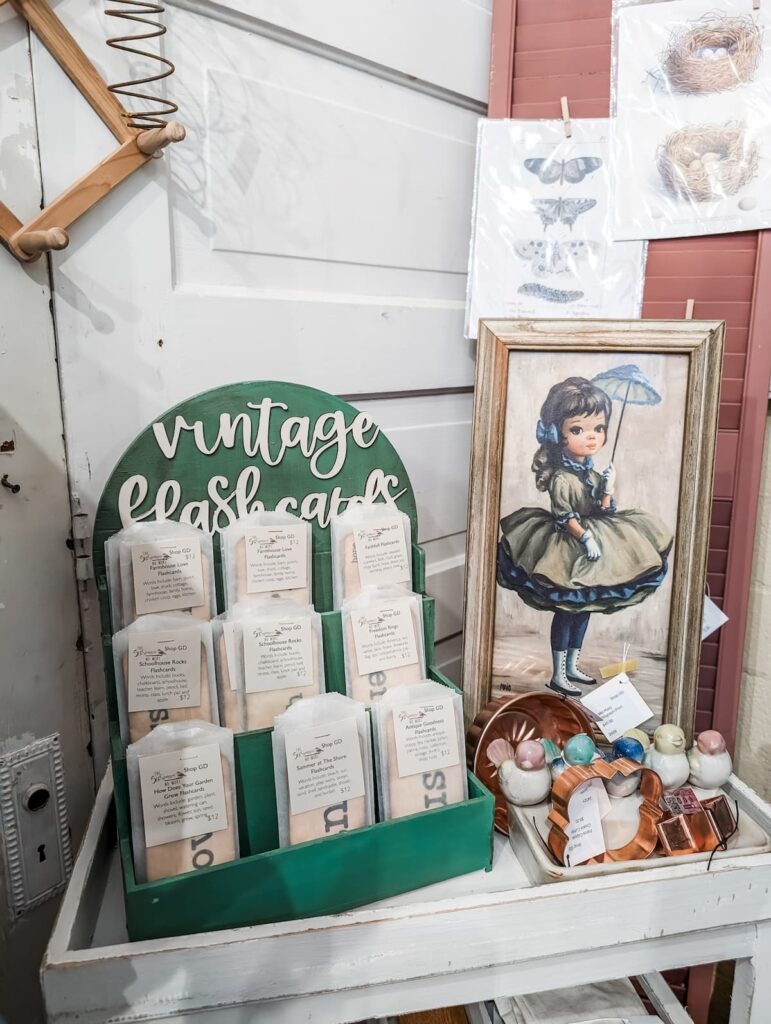
Operating a vintage and upcycled shop inside an antique mall has stretched my imagination, thinking skills and creativity. When it came time to display the vintage flashcards I make (you can also purchase the vintage flashcards online!) I perused Pinterest and searched in the googler for inspiration. A vintage seed packet store display kept catching my attention. So using my imagination and creativity along with my thinking skills I chose to make my own. I’ll walk you through my process so you too can create an easy display piece for vendor booths, markets, or shops you may have.
From Twigs & Fluff
Want to see more if the vintage flashcards? Here are a few sets – more are located in the shop just for you!
Simple Supplies For An Easy Display Piece
Seriously you need three things, possibly four if you add words to your display piece.
SUPPLIES
The below links are affiliate links. I make a small commission at no cost to you when you make a purchase from the links.
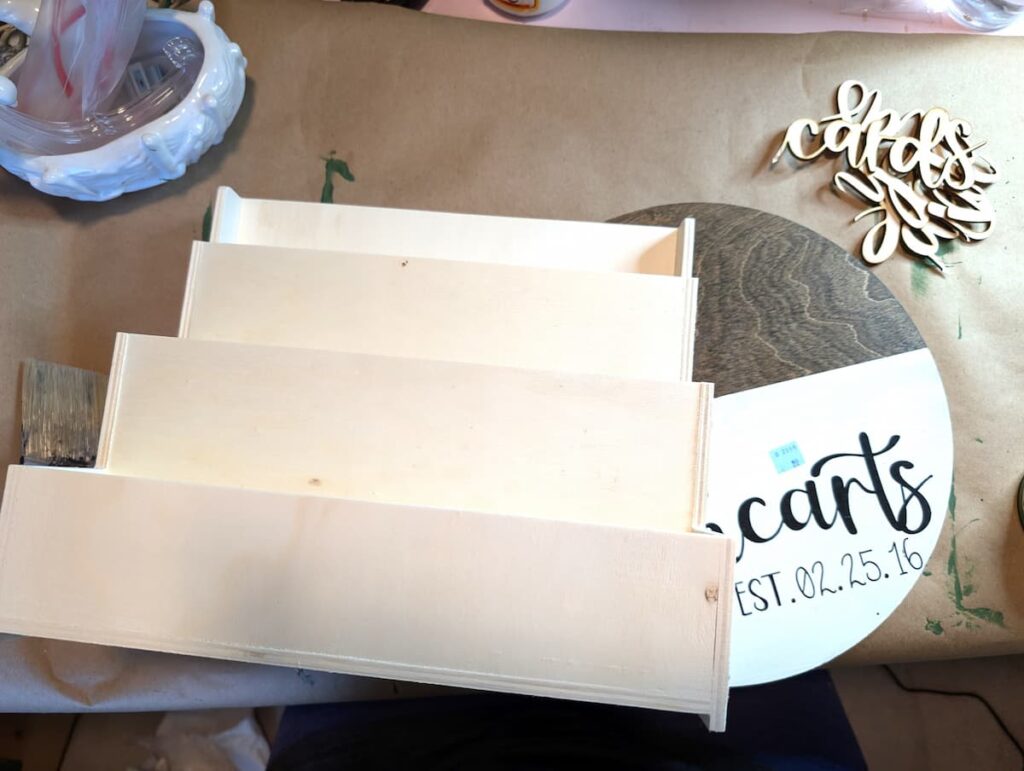
- 3 Tier Wooden Display Stand
- 12 Inch Wood Circle
- Paint (I used Kudzu by Dixie Belle)
- Small screws to attach the stand and circle
- Optional: Brown Glaze, Top Coat, and Lettering)
How I Created An Easy Display Piece For Vendor Booths
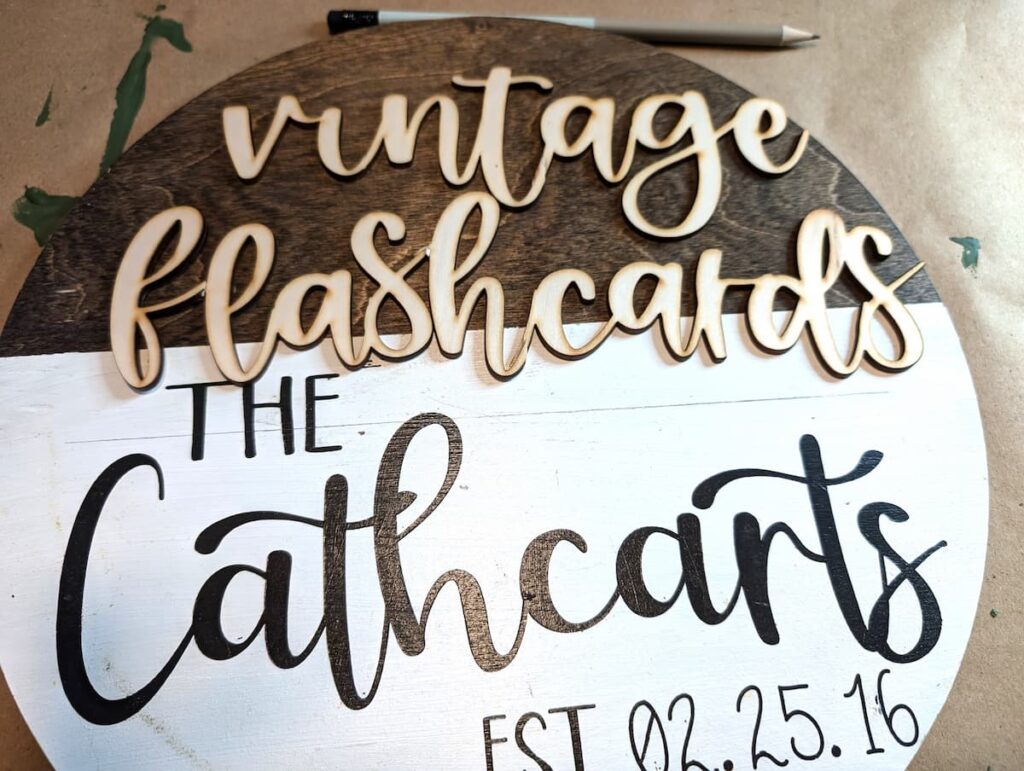
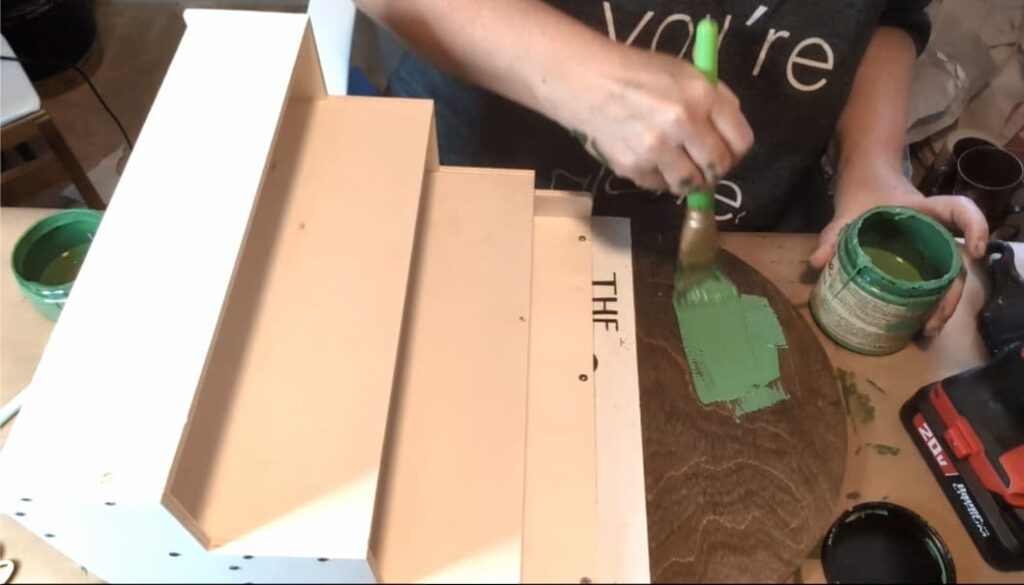
In the supplies list above I included the wooden circle I used for behind the three tiered stand. I thrifted mine for ninety-nine cents, upcycling or “fifth sparrow-ing no more” at its finest! My letters spelling “Vintage Flashcards” were from my friend Charity at the blog Mornings On Macedonia. She cut them on her xTool P2 machine. I absolutely love the font and adding it to the top of my display stand was the perfect final touch!
Step One Of Creating The Vendor Booth Display Piece
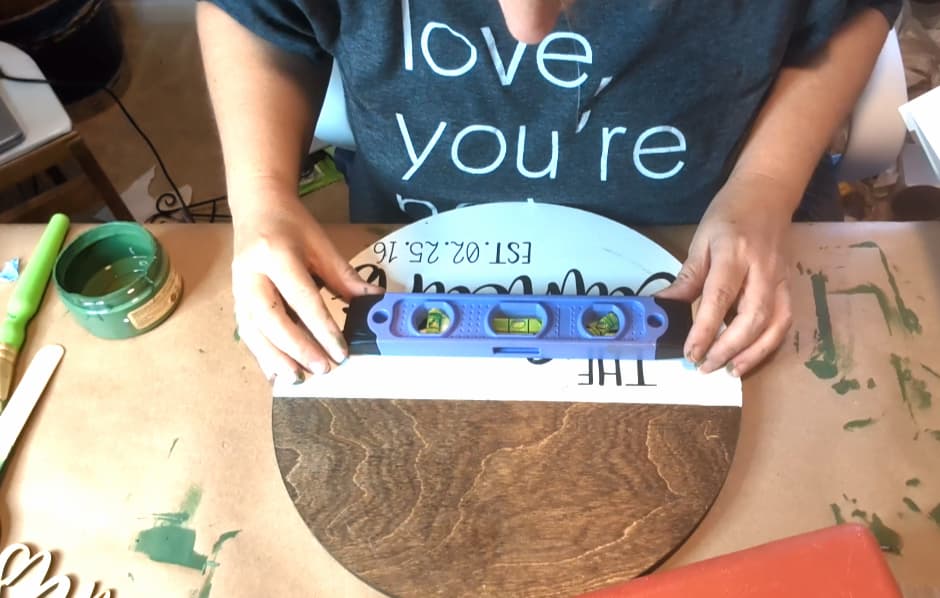
I started by drawing a level line on my circle so I could attach the stand to it straight. I made sure my letters fit on the partial circle and moved on to attach the two pieces together.

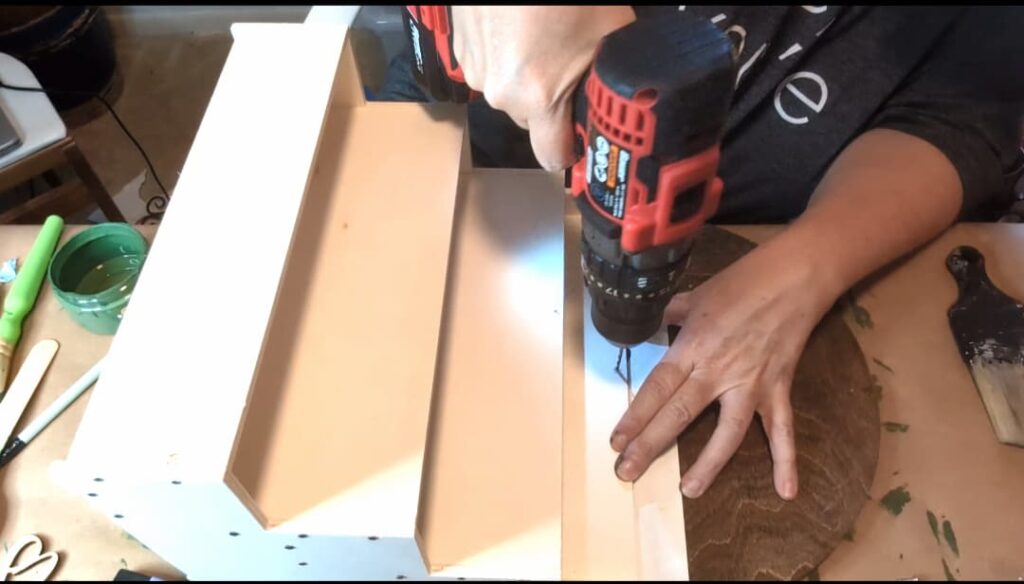
Step Two Of Creating The Vendor Booth Display Piece
I used three screws to attach the two pieces together. Drill pilot holes first to keep the wood from splitting. Use wood screws, one in the middle and two on either side at the top of the display stand.
Step Three Of Creating The Vendor Booth Display Piece
Once the stand and the circle are attached together paint the display piece the color of your choice. After the paint dried I used a brown glaze and then a topcoat to seal in the paint.
Step Four Of Creating The Vendor Booth Display Piece
The letters were painted with white paint.
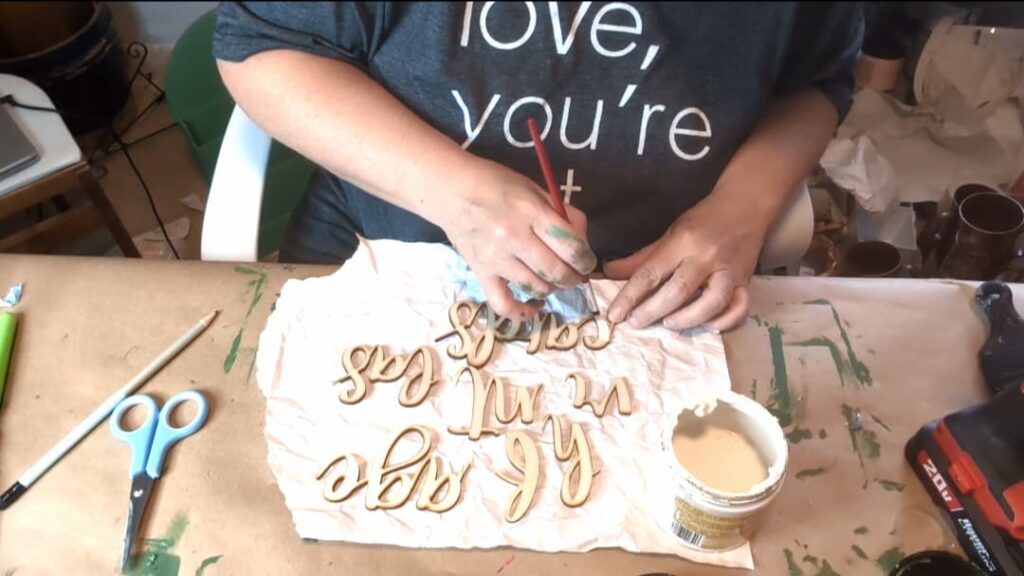
After those were left to dry I adhered them to the display stand with titebond glue.

Need To Watch That In A video?
An Easy Display Piece For Vendor Booths
This display stand is perfect for small art, cards, and jewelry. It is so easy to make it completely your own with a paint of your choice, using a different shape for the backer, or with the lettering you choose. And the good thing is that the display stands do come in a two pack so its easy to create a matching pair!
Learn More About My Vintage & Upcycled Shop
Before You Fly Away To Create An Easy Display Piece For Your Vendor Booth
Pin any of the images to Pinterest so you can make an easy display stand for small items in your vendor booth, craft show or shop – hover over any picture to save the pin to your Pinterest account. So easy!
One Comment